
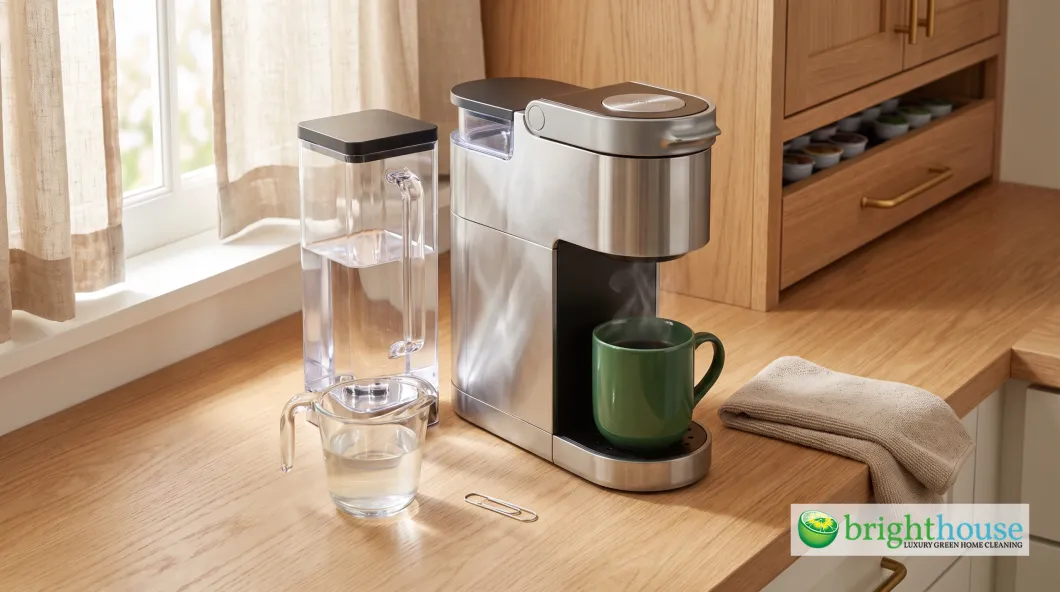
Keurigs are built for convenience. Pop in a pod, press a button and you have coffee in under a minute. That speed is exactly why so many of them go years without a proper cleaning, until the coffee starts tasting off or the machine only fills half your mug.
Here is what most people do not realize: those are two different problems with two different fixes. A bitter taste, slow brewing and a glowing descale light mean mineral scale inside the machine, and descaling fixes it. Short cups and sputtering usually mean the needle is clogged with coffee grounds, and no amount of descaling will clear it. This guide shows you how to clean a Keurig both ways, plus the reservoir, filter and the spots where mold likes to hide.
If you also keep a drip machine with a glass carafe, it needs a slightly different routine. This guide is for pod brewers.
The Quick Answer
| Job | What It Fixes | How Often |
|---|---|---|
| Descale | Bitter taste, slow brew, descale light, white crust | Every 3 months, or when the light comes on |
| Clean the needles | Half cups, sputtering, grounds in your mug | Monthly, or whenever cups come up short |
| Wash the reservoir and lid | Musty taste, slime, mold spots | Weekly |
| Wash the drip tray and pod holder | Coffee crust and sticky residue | Weekly |
| Replace the water filter | Off flavors, more scale | Every 2 months |
Keurig’s descaling solution label recommends descaling every 3 months. Hard water may call for more often.
How to Descale a Keurig With Keurig Descaling Solution
Keurig’s own descaling solution is the method the company recommends, and its label lays out the steps. The process takes about 45 minutes for most brewers and longer for dual brewers like the K-Duo.

- Prep the brewer. Remove any pod, empty the water reservoir and take out the charcoal water filter if you have one.
- Add the solution. Pour in the descaling solution as your bottle’s label directs. For many brewers with a reservoir, that means the entire bottle, then fill the empty bottle with water and add that too.
- Brew it through. Place a large mug on the drip tray. Run a cleansing brew on the largest cup size with no pod. Pour out the mug and repeat until the add-water light comes on.
- Let it stand. Leave the brewer on and let it sit for 30 minutes. This lets the solution work inside the internal tank where scale builds.
- Rinse thoroughly. Empty any leftover solution, rinse the reservoir, fill it with fresh water to the max line, and run at least 12 rinsing brews on the largest size. Refill as needed.
How to Clean a Keurig With Vinegar
White vinegar is the budget option, and plenty of people use it. It dissolves scale well. The trade-off is a stronger smell and a few more rinses. Keurig recommends its own solution, so if your brewer is under warranty, check the manual before you switch.
- Empty the reservoir and remove the filter. Toss any pod in the holder.
- Fill with vinegar and water. Fill the reservoir about halfway with plain white vinegar and top it off with water to the max line. For heavy scale, use undiluted vinegar.
- Brew until it is empty. Run largest-size brews with no pod into a big mug, emptying it each time, until the add-water light comes on.
- Soak for 30 minutes to 4 hours. Leave the brewer on so the vinegar can sit in the internal tank. Longer is better for a machine that has never been descaled.
- Rinse 12 or more times. Rinse the reservoir well, fill with fresh water and run at least 12 rinse brews. If you still smell vinegar, run a few more.
How Much Vinegar to Clean a Keurig
For a classic Keurig with a 48-ounce reservoir, about 3 cups of vinegar mixed with 3 cups of water fills it halfway and halfway. Larger reservoirs take proportionally more. For single-cup models without a reservoir, like the K-Mini, mix half vinegar and half water in a mug, pour it into the water chamber and brew one cup at a time, repeating until you have run about 4 to 6 cups through. Then rinse the same way with plain water.
How to Clean a Keurig 2.0 With Vinegar
The process is the same for Keurig 2.0 models: half vinegar, half water, largest-size brews with no pod, a 30-minute rest and at least 12 rinse brews. Many 2.0 machines have a smaller reservoir, so you may need to refill partway through the rinse.
How to Clean a Keurig Without Vinegar
Hate the smell? Citric acid works well. Dissolve about 1 to 2 tablespoons of food-grade citric acid in a full reservoir of warm water and follow the same brew, soak and rinse steps. It descales effectively and leaves no lingering taste after the rinses.
How to Clean the Needle on a Keurig Coffee Maker
If your Keurig suddenly makes half a cup, gurgles or leaves grounds in your coffee, the needle is the first thing to check. A Keurig has two needles. The entrance needle is in the lid and punctures the top of the pod. The exit needle is in the bottom of the pod holder and punctures the bottom. Coffee grounds pack into both.
- Unplug the brewer. The entrance needle is sharp, so work carefully.
- Clear the entrance needle. Open the lid and find the needle on the underside. Straighten a paper clip and gently push it into the holes in the needle, wiggling to loosen grounds.
- Remove the pod holder. On most models, it pops out when you press on its sides or push up from below. Separate the funnel from the holder if yours comes apart.
- Clear the exit needle. Push the paper clip up through the tube on the bottom of the pod holder and move it around to dislodge grounds.
- Rinse the pod holder. Wash it in warm soapy water, rinse and pop it back in.
- Run a water-only brew. This flushes out loosened grounds.
Many Keurig 2.0 and newer brewers came with a small plastic needle maintenance accessory. You fill it with water, insert it into the pod holder and pump the handle several times to flush the exit needle. If you have one, it is the easiest way to do this job.
How to Clean a Keurig Water Reservoir and Filter
The reservoir sits full of room-temperature water day after day. That is an easy place for slime and mold to grow, especially if it sits near a sunny window. Once a week, empty it, wash it with warm water and a drop of dish soap, and wipe the lid. A bottle brush reaches the corners. Rinse well so no soap taste carries into your coffee. Most reservoirs are hand-wash only, so check your manual before putting it in a dishwasher.
If your brewer uses a charcoal water filter cartridge, replace the filter every two months. Rinse a new filter under running water for a minute and soak it as the instructions say before installing. Remove it whenever you descale.
How to Clean Mold Out of a Keurig
If you see dark spots or slime in the reservoir or lid, toss any filter and scrub the reservoir with hot soapy water and a brush. Wipe it with a cloth dampened in white vinegar, rinse well and air dry. Then run a full vinegar descale with a long soak and at least 12 rinses. Going forward, empty the reservoir if you will not use the brewer for a few days, and leave the lid off to dry.
Drip Tray, Pod Holder and Outside
Pull out the drip tray weekly and wash it in warm soapy water. Many drip trays and pod holders are top-rack dishwasher safe, so they can ride along with a freshly cleaned dishwasher, but check your model first. Wipe the outside, buttons and lid with a damp microfiber cloth. Never submerge the brewer itself.
How Often to Clean a Keurig
A good rhythm for most households: rinse and refill the reservoir with fresh water daily, wash removable parts weekly, check the needle monthly and descale every three months. If you have hard water or brew several cups a day, descale every one to two months instead. Add a descale to your seasonal cleaning checklist so it does not slip.
Small appliances like this are part of what makes a kitchen feel truly clean. If you want help with the rest, Brighthouse offers professional cleaning for your home and recurring home cleaning services throughout the Nashville, Brentwood and Franklin area.
For Short-Term Rental Hosts
A Keurig is one of the most-used items in any rental, and guests rarely clean it. A musty reservoir or a short cup on the first morning sets a bad tone. Reliable short term property cleaners can wash the reservoir, clear the needle and restock pods at every turnover. Adding the coffee station to your between-guest housekeeping list keeps that first cup tasting fresh.
Frequently Asked Questions
How do I clean my Keurig with vinegar?
Fill the reservoir halfway with white vinegar and top it off with water. Brew largest-size cups with no pod until it is empty, let it sit for 30 minutes, then rinse with at least 12 fresh-water brews.
How often should you clean a Keurig?
Wash removable parts weekly, check the needle monthly and descale every three months, or sooner if the descale light comes on or you have hard water.
Why is my Keurig only filling half a cup?
The needle is probably clogged with coffee grounds. Unplug the brewer and clear the entrance and exit needles with a paper clip or the needle maintenance tool.
How do I get the vinegar taste out of my Keurig?
Run more fresh-water rinse brews. Most machines need 12 or more. Wash the reservoir with soapy water and rinse it well too.
Can I use apple cider vinegar to clean a Keurig?
It is better to use plain white vinegar. Apple cider vinegar can leave a smell and residue.
How do I clean a Keurig K-Mini or other single-cup model?
Pour a half vinegar and half water mix into the water chamber and brew one cup at a time, about 4 to 6 times. Rinse the same way with plain water and clean the needle.
The Bottom Line
Cleaning a Keurig is really two jobs. Descale every three months to clear mineral scale and fix taste and speed. Clean the needles whenever your cups come up short. Keep the reservoir, drip tray and pod holder washed weekly, and change the filter every two months.
If your Keurig is acting up today, start with the needle. It takes five minutes. If the coffee still tastes flat, run a descale this weekend.
A clean machine makes a fuller, better-tasting cup, every single morning.


